Monday 2 November 2015

Rosemary Roasted Chicken

Christmas is a month or so away, and I am trying out some new dishes that will not take up too much time to prepare and that is Rosemary Roasted Chicken.

I have intention to buy a whole chicken but there is only 3 mouths to feed at home, it will be an overkill. So instead of one whole chicken, I bought 6 chicken thighs, but I only use 4 in this recipe. It is such easy recipe and fail prove.

Most importantly, Mr W likes it. Crispy outside and juicy inside. When I slice the meat, the juice oozed out. Yummy!!!


Ingredients 
4 chicken thighs (can be replace with whole chicken or breasts)
½ lemon, wedged (use 1 lemon if using whole chicken)
½ yellow onion, quartered (use 1 whole onion if using whole chicken)
3 cloves of garlic, crushed
Olive oil

Dry rub
3 to 4 sprigs of fresh rosemary, chopped
Garlic powder, to taste
Onion powder, to taste
Ground black pepper, to taste
Salt, to taste

Vegetables
3 Potatoes
3 Carrots
1 Broccoli, using its florets
9 Cherry tomatoes
½ yellow onion, quartered
½ lemon, wedged
2 cups of chicken broth

Method
1. Clean the chicken thighs, pat dry and set aside.
2. Pour olive oil of the chicken and rub the chopped rosemary, garlic, onion, black pepper and salt onto the chicken. Make sure all parts of the chicken is covered with the dry rub. 
3. Squeeze half a lemon on to the chicken pieces and leave the wedged lemon on the tray, together with the quartered onion and crushed garlic.

4. In a preheated oven, oven roast the chicken pieces at 180°C for 1½  to 2 hours or till the chicken pieces turn golden brown. 
*Note: the time in the oven is based on respective ovens, so please keep an eye on the chicken after 1½ hours.
5. Place another tray just below the chicken after the 1st hour of roasting. In the tray, add 2 cups of chicken broth, quartered potatoes, carrots, onions and tomatoes to cook. It will collect the juice of the chicken and cook together with the vegetables. 


*Note: you can add any vegetables of your liking. 

For whole chicken,
Please stuff 1 quartered onion, squeezed 1 wedged lemon, chopped rosemary into the chicken cavity. Tied the chicken legs together. 
Using the olive oil and the same dry rub, rub on to the chicken and make sure it covers the whole chicken. 
Preheat oven and oven roast the chicken at 180°C for 2 hours.
It is advisable to use a meat thermometer to test the doneness of the chicken. Insert the thermometer into the thickness area of the chicken, the temperature should be approximately 74
°C.

Sunday 25 October 2015

Pan seared Oregano Butter Prawns

When I want something that cooks fast and taste good, one of my choice will be prawns/shrimps. Simple seasoning and you will get tasty prawns.


While waiting for the bread to finish baking, I took out some prawns and was thinking how to prepare it since the main course for the evening is Wagyu beef stew. Looking through the spice cabinet, I took out 5 ingredients -
1 tsp onion powder 
1 tsp garlic powder 
1 tsp oregano flakes
Salt & black pepper, to taste 

Method
1. Remove the shell and deveined the prawns. Leave the tail on. 
2. Mix the onion powder, garlic powder and oregano flakes together. 
3. Coat the prawns well in this spice mixture.
4. Heat pan with 1 tbsp of butter and olive oil. Once pan is well heated, place the prawns in the pan. Do not overcrowd them in the pan. Once the prawns change colour, grind some salt and black pepper onto the prawns. When the prawns turns orange on the side facing down to the pan, turn the prawns to the other side. Remember not overcook it.  
5. Dish up and serve. 

It still taste good when it's cold.

Monday 19 October 2015

Mashed Potatoes

Mashed potatoes is always my love. Oh...I just love the creamiest of this mashed potatoes.

I have tried a few times before Mr W concluded this recipe will be the one I will make in future. But I am still thinking of altering it. *Lol. We shall see how it goes.

Ingredients (Serves 4)
5 large russet potatoes, peeled & cubed
80 ml sour cream
3 cloves of garlic, finely minced.
1 cube of chicken bullion 
100g cream cheese
100g butter
Salt & pepper, to taste
Oregano flakes, to taste

Method
1. In a large pot of boiling water, cook the potatoes, garlic and bouillon until potatoes are soft.
2. Sieve the potatoes and garlic, place them in a large bowl. Reserve the water. 
3. Mash the potatoes. Add in the sour cream and cream cheese; incorporate them into the mashed potatoes. Add the reserved water to it, if needed. 
4. Add the butter and mix well. Season with salt and pepper, to taste. 
5. Sprinkle the oregano flakes before serving. 

Simple and easy. 

Note: 
1. This dish can be prepared a day ahead. Place the mashed potatoes *without adding butter into a slow cooker and allow it to slow cooked on low. Before serving, add in the butter and season it with salt & pepper. 
2. To achieve a smoother mashed potatoes, you can whisk it.  

Bacon Baked Beans

This side dish is so simple. Transforming the ordinary can of baked beans to a yummilicious one. 


Ingredients
1 can baked beans
¼ cup brown sugar
¼ of a yellow onion, chopped
1 tbsp ketchup
 tsp English mustard
½ tsp Worchestire sauce
½ tsp red wine vinegar
Salt & pepper to taste
2-3 slices of bacon

Method
1. Combine the above except bacon in a baking dish. Bake it at 150°C for 30 minutes. Remove from oven. 
2. Bake the bacon separately. For crispy bacon, please refer here for the recipe. Once baked, remove from the oven and cut the bacon to smaller pieces. 
3. Sprinkle the crispy bacon on top of the oven baked beans.

You will love the savoury beans with a light crunch of the bacon. 

Oven Baked BBQ Pork Ribs - Baby RIbs & St Louis Pork Ribs

It is rather difficult to find a good rack of ribs at a reasonable price, so I decided to try one at home and it turned out to be surprising good. The dry rub on the ribs is important. You can find the ingredients for the dry rub here.

The picky Mr W likes the seasoning of the baby back and the only thing he thinks I ought to reduce is the amount of BBQ sauce I added, which I agreed.

*Update - 19 May 2020...
I have added honey into the BBQ sauce for a nicer glaze and not overpowering BBQ. Mr W said the taste is just right. I have a picky husband. Hard to please. This time I used St Louis Pork Ribs which are bigger compared to the last time (I used baby ribs). So the temperature and baking time defers. I will indicate in the Method.


Ingredients (Serves 4)
2 pounds of baby back ribs/1 rack of St Louis Pork Ribs
1/2 cup of BBQ sauce
1/4 cup of honey
Dry Rub

Method
1.  Using a butter knife to remove the membrane at the back of the ribs. *By doing so, you will definitely get tender ribs.


2. Apply the dry rub all over the ribs and wrap the rack in a non-stick baking sheet and then another layer of aluminium foil.
Foil below and baking sheet on top


3i. Here are my St Louis Pork Ribs after removing the membrane & applying of the rub.
St Louis Pork Ribs
St Louis Pork Ribs
3ii. This is the baby ribs.
Place the marinate dry rub baby ribs on the baking sheet
4. Wrap the ribs up with the baking sheet and then the aluminium foil like this.

Wrap it up! *This is not a baguette!
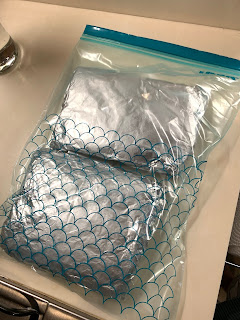
5. Place them in a ziplock bag before putting them in the fridge to be marinated for a minimum of 6 hours or overnight. *because the meat will "sweat".

6. Remove from the fridge.

7. Preheat oven at 150°C/160°C for 10 to 15 minutes. Bake the ribs (still in the foil) in the oven at
i) for baby ribs - 150°C for 2 hours
ii) for St Louis Pork Ribs - 160°C for 2.5 hours (this is due to the thicker bones & mass)

7. While they bake in the oven, stir in the honey to the BBQ sauce.
*Note: I made my bbq mixture based on our liking. So after stirring in the honey, do a taste test to see how you like it. You may add more BBQ sauce or honey to your own preference.

8. Remove the ribs and lay them on the tray.

9. Spread your BBQ mixture on the front and back of the ribs, continue to grill them (bones up) in the oven at 175°C.
9ii. Remove and turn over the ribs (this time meat up) and apply the mixture again. Grill for another 15 minutes.

*Note: you may also just apply the BBQ mixture and baked for a straight 30 minutes without removing it from the oven. I did this method with the baby ribs.

10. Serve it with mashed potatoes or bacon baked beans.

Dry Rub for Meat

What makes me wanna write this entry is because most of us don't know that dry rub is pretty important for meats. Be it chicken, pork or beef...even mutton. So far I have use this dry rub for my pork rib and chicken. it is absolutely delicious.

In the beginning, I was somewhat skeptical about it because of the cayenne pepper and paprika powder. But the end result was amazing.


Ingredients
¼ cup brown sugar
1½ tbsp paprika
1 tbsp kosher salt
1½ tbsp black pepper
1 tsp garlic powder
1 tsp onion powder
¼ to ½ tsp cayenne pepper (depends on your preference)

Method
Combine the above mentioned ingredients and mix well.

*Note: you can make this dry rub in advance. Keep it in a airtight container. It can be kept for a month.

Monday 12 October 2015

A Treasured Terengganu dish - Kay Hong

When I first come across this dish, it was at Mr W(then my boyfriend)'s sister's place. This is one of Mr W 's favourite Terengganu Nyonya dish. The name of this dish when I first got to know was "Hong". After 5 years, I got to learn that the name of this dish is Kay Hong. This is a very popular dish for the Nyonya to serve for prayers or Chinese New Year. It keeps well and needs no refrigeration. The more you reheat it, the better the dish becomes.

I am not crazy over this dish but I won't mind eating it. As for Mr W, I can say he is crazy over this dish. He can go for round two when I cook this. He loves having the sauce over his rice and the hard boiled eggs. One thing I have to admit is that this savoury sweet sauce tends to be pretty addictive.

By the way, Mr W said no one except his mom cooks the best dishes, even his sister can't replicate them. My mom-in-law ever told me that she would love to teach me all the dishes she used to cook and all the kueh kueh she used to prepare. But at her age of 94, she doesn't enter the kitchen anymore. Despite her age, she is still very alert and healthy. She will tell me the ingredients for the dish but the rest is all dependent on me. *Stress*

Yesterday was my first trial to cook this dish and I was very pressurized. I need to cook this dish to suit the very picky Mr W's taste. Before I prepare all the ingredients, I gave my mom-in-law a call to confirm the ingredients.


Now let's start with the Ingredients
4 chicken thighs
200g of pork belly
4 hardboiled eggs, peeled
1 pieces of gula melaka, to taste
2-3 tbsp preserved bean paste aka tau cheo
70g shallots
30g garlic
2 cups of water
1 tbsp dark soy sauce, depends on your colour preference
3 tbsp of kicap manis

Method
1. Pound the shallots and garlic. Set aside.
2. Parboil the whole piece of pork belly and chicken thighs. Remove the meat pieces and discard the water.
3. Heat 1 tbsp oil in wok. Fry the pounded shallots and garlic until fragrant.
4. Add in the gula melaka and tau cheo and stir fry for a few minutes.
5. Add the pork belly and chicken pieces and stir fry.
6. Pour in 2 cups of water and allow it to simmer.
7. Add the dark soy sauce and kicap manis, give it a stir. Put the hardboiled eggs in and let it simmer until the pork and chicken are cooked.
8. Dish up the pork belly and slice them into 1 cm thick. Put them back into the wok or you can dish up the chicken and egg with the delicious sauce and serve with a plate of steam white rice. Enjoy!

Do note that the sweetness of this sauce tends to overpower the saltiness, hence there is a need to balance both. Can't be too sweet, can't be too salty. Adjust the proportion to your taste. 

Sunday 11 October 2015

Spinach in Superior Broth with 3 types eggs

Since I have century eggs left after making the steamed tofu with braised sauce, topped with century eggs, I decided to buy a bunch of spinach. While I remember the spinach, I forgot about the salted eggs. Never mind, I will make do with the spinach, century eggs and eggs. I love spinach, who doesn't. Well I know Popeye may prefer this cooking method for spinach. :) Who knows. Hehe. 


Ingredients
A bunch of spinach
1 egg
1 century egg
1 salted egg
1 cup of chicken broth
1 tbsp of wolfberries
2 to 3 cloves of garlic, finely chopped

Method
1. Wash the spinach individually and remove the fibrous layer from the stalk. Bend to break the stalk at around 2 to 3 inches. You will be able to see the fibrous layer, pull it backwards to remove them.
2. Separate the stalks and the leaves. Set aside.
3. Peel and dice the century egg and set aside.
4. Remove the black husk of the salted egg and wash it clean before boiling it.  Once the salted egg is hard boiled, peel and dice it. Set aside.
5. Wash the wolfberries and set aside.
6. Heat at the wok with a tsp of oil. Stir fry the garlic to fragrant.
7. Add in the stalks and fry for a few minutes, add in the leaves. Toss it for a while and pour in the chicken broth. Stir the spinach in the broth and allow it to simmer.
8. Once it is almost boiling, add in the century egg, salted egg and wolfberries. Give it a stir.
9. Lightly beat the egg and pour it over the spinach. Allow it to simmer for a few minutes and turn of the heat. Dish up and serve.

This is a simple dish and its so tasty. Although I miss out the salted egg, it is still delicious and most of all healthy.

For those who has high cholesterol, you may wish to use half of a century egg and salted egg.

Cheers!!!

Friday 9 October 2015

Cold Dish - Steamed ToFu with braised sauce topped with Century Egg & Pork Floss

*Updated - 16 Jan 2016.
Everytime I steamed the tofu and chill it, the texture is different. So this time round, I use the tofu out of the box. Just rinse it with water and go straight to Method point 2.

I was told by an auntie at the supermarket that the tofu can be eaten out of the box. By steaming it and chilling again will cause the texture of the tofu to alter.

Hmm...so now I know. This is an update. Skip the steaming part and go straight to the prepping of sauce. *

Mr W has always like this dish but I have never try making it till today. It is pretty easy to prepare. Looks good & taste good!


Ingredients
1 box of silken tofu
1 century egg
1 tbsp crispy pork floss
1 chopped spring onion

Sauce
1 tbsp oyster sauce
1 tsp soya sauce
1 tsp sesame oil
1-2 drops of dark soya sauce
1 tsp fish sauce
100ml chicken stock

For thickening
½ tsp cornflour with water

Method
1. Steam the silken tofu for 3 minutes. Set aside to cool. Pour away the excess water from steaming.
2. Prepare the sauce by combining all the ingredients under sauce in a saucepan. Bring it to a boil.
3. Stir in the cornflour mixture. Once it thickens, Remove from heat and allow it to cool.
4. Dice the century egg and arrange them on top of the tofu.
5. Once the sauce is cooled, scoop a tbsp of sauce at a time and pour it over the tofu. *The amount to scoop will be based on personal preference.
6. Chill in the fridge for 10 to 15 minutes.
7. Before serving it, top it with the chopped spring onion and crispy pork floss


Wednesday 7 October 2015

A.T.M aka Apple Tuna Mayonnaise

Years ago, I stumbled across this way to prepare my A.T.M aka Apple Tuna Mayonnaise. Mr W was taken by surprise when he first ate this and he likes it. Since then I have been preparing tuna mayo the A.T.M way.


This method to prepare tuna mayo adds a crunch to it. The crisp, juicy sweetness of the apples add another dimension to this plain tuna mayo. I personally prefer to use tuna in brie water or olive oil. This way I can control the amount of mayonnaise to be added.

Ingredients
1 can of tuna in olive oil
¼ red apple
¼ green apple
1 tbsp mayonnaise
Ground black pepper, to taste

Directions
1. Dice the apple into smaller pieces. Soak them in salt water for a few minutes.
2. Scoop the tuna out from the can. Remember to remove excess oil.
3. Drain the diced apples and add them to your liking; more red than green or vice versa.
4. Add the mayonnaise in and mix well.
5. Add ground black pepper to taste.

Mr W prefers more mayonnaise. So I usually prepare it with 1 tbsp mayonnaise. He will add more mayonnaise and black pepper when he takes his A.T.M breakfast. If your family prefers more mayo, just add it in. This is a simple recipe where you can adjust the amount of ingredients to use to your preference.

Enjoy!

Tuesday 29 September 2015

Slow Cooked Beef Stew

A hearty stew to fill the tummy and it's easy to prepare.

This time round I am using the slow cooker and let it do its job. By the time we get home, dinner is ready. Actually it's not true, cos Mr W will want either rice or bread to go with his stew, especially beef stew.

This stew can be prepared the night before. This will save you the hassle of a rush morning. 
Updated: Slow Cooked Beef Stew
Ingredients
700g beef stew meat, cut into 1 inch cubes
¼ cup flour
½ tsp of salt
½ tsp of ground black pepper
1 tsp garlic powder *updated on 24 Oct
3 garlic cloves
1-2 bay leaves
1 tsp of paprika
1 tsp of Worcestershire sauce
1 yellow onion, chopped
2 cups beef broth *updated on 24 Oct
6 potatoes, diced
4 carrots, coarsely chopped
White button mushroom, sliced *updated 14 Apr 18
3 stalk of celery, chopped 1 inch long *updated 14 Apr 18

Method
1. In a small bowl mix the flour, garlic powder, salt and pepper. Coat the meat with this flour mixture. Place them in the slow cooker. Pour the remaining mixture into the slow cooker, if any.
2. Pour in the beef broth and stir in the garlic, bay leaves, paprika, Worcestershire sauce, potatoes, carrots and celery.
3. Cover and cook on Low setting for 10 to 12 hours, or on High for 4 to 6 hours.

And there you have it, a plate of hot flavourful beef stew. Serve it with baguette or over steam rice. 

Oh I just love stew! They are true comfort food.

Note: 
If you prefer more sauce, increase the amount of broth - which I did. My original recipe called for 1½ cup but I up it to 2 cups. *updated on 24 Oct
If you prefer more vegetables, add them in.
If you have fresh brown or white mushrooms, slice and add them to the slow cooker.

Monday 28 September 2015

Sautéed Brown/White Shrooms

Mushrooms...my favourite!

Be it shiitake mushrooms, white mushrooms, enoki mushrooms, portobello mushrooms, abalone mushrooms, brown mushroom....you named it, I love them all.

Sautéed mushrooms are simply delicious. Add a little garlic or cheese or just salt and pepper to sauté. They taste wonderful and most importantly, they are nutritious. 

Today we will be cooking white/brown mushrooms. 

Ingredients
200g fresh white/brown mushrooms
1 tsp of butter
1 tsp of olive oil
1 slice of cheddar cheese
Kosher salt, to taste

Coarsely ground black pepper, to taste

Method
1. Slice the fresh mushrooms. Note: Do not slice too thinly as the mushroom will shrink in size.
2. Heat pan and add the butter and olive oil. Once the butter is melted, add in the sliced mushroom.
3. Over medium heat, toss the mushrooms till golden brown and caramelized.
4. Season it with salt and pepper to taste. 
5. Remove from heat, tear the slice of cheddar cheese in to slips and stir it into the mushrooms. 
6. Once the cheddar is melted, dish up and serve.

Well this is how I prepared my mushrooms. Sometimes I add finely minced garlic. Do note that if you are using finely chopped garlic, give it a few quick toss (make sure you don't burn the garlic) and add in the mushrooms. Omit the cheddar if garlic is added. But it's up to you. Cheers!

Oven Grilled Miso Chicken

Chicken is the most frequent cooked meat in my household. So I need to think of different methods to prepare this poultry.

I have oven baked with simple salt and pepper, you can refer to Oven Baked Chicken for the recipe. Simple and hearty meal with Chicken Stew. These are just a few recipe for your consideration. 

As for today, I'm going into Japanese cuisine, using white miso paste to marinate the boneless chicken thighs. This goes well with a bowl of steam rice. 

Of course, by the look of the photo before, I have made it into a Japanese-Western cuisine - baked baby potatoes and sautéed mushrooms.


A fusion of Western and Japanese

Ingredients
4 boneless chicken thighs
8 baby potatoes

Marinate
1/4 cup of white miso paste
3 tbsp mirin
3 tbsp sake
1 tbsp sugar
2 tsp soya sauce

Method
1. Combine all ingredients in the Marinate, mix well and set aside. 
2. Wash the chicken thighs and trim off excess fats on the chicken thighs. *I left the skin on. Pat them dry.
3.  Marinate the chicken thighs for at least 3 hours, or overnight. 
4. Pre heat oven at 215°cDrizzle some olive oil on the baking tray.
5. Wipe excess marinate from the chicken and arrange them skin side up. 
6. Coat all the baby potatoes with the marinate and place them around the chicken. 
7. Bake in the oven for 15 minutes at 215°c, turn the chicken over and bake for another 10 to 15 minutes. 

Once done, slice the grilled chicken and enjoy it with a bowl of steam rice...as for me, I had mine with potatoes and sautéed mushrooms

Wednesday 23 September 2015

砂锅饭 Claypot Rice

I hardly got a chance to eat claypot rice. On the contrary, my husband (let's call him Mr W) had eaten numerous claypot rice from different stalls in Singapore. Be it the popular one in Geylang or those at Chinatown or at cafes. Thus far, I have been hearing him raved about the claypot rice at Kreta Ayer in Chinatown. Don't ask me which stall cos I don't know. 

So I decided to give it a try and well Mr W's verdict is pleasing to my ears. Except one remark - those that sells claypot rice at the hawker doesn't use so much ingredients! 
Oh...by the way, Mr W can be very picky when comes to food. So I am glad that I am able to make Claypot rice at home and add whatever I like! 
Since this is my first trial, I will keep it as authentic as possible.

Presenting to you - Jeane's 砂锅饭! Adapted from the Meatmen.

Apologies for the ugly photo. I should have taken the whole claypot rather than a small bowl. Nonetheless, it's the taste that matters right? 
Ingredients 

3 boneless chicken thighs
1 lup cheong 
3 shiittake mushroom
3 salted mackerel in oil
1 handful of chye sim
3½ cups of washed rice
3 cups of chicken stock 
3 gloves of garlic
1 inch thick ginger

Chicken marinate
2 tbsp oyster sauce
1 tbsp dark soy sauce
1 tbsp sesame oil
1 tbsp cornflour
½ cup of water

Sauce
1 tbsp oyster sauce
1 tbsp dark soy sauce
2 tsp soy sauce
1 tbsp hua tiao wine
1 tbsp sugar
2 tsp sesame oil
A few dash of pepper

Preparation
1. In a bowl, mix all the ingredients in the chicken marinate. Set aside.
2. Trim away the excess fats on the chicken thighs. Wash and pat dry. Cut them in to 1 to 2 inches in size. Add them into the bowl of chicken marinate. Mix well and let it marinate for at least 2 hours.
3. Finely chop the garlic and ginger. Set aside.
4. Slice the lup cheong and the shiitake mushrooms. Set aside.
5. Dice the salted mackerel. *Can be replaced with dry salted fish.
6. Wash and chop the chye sim into 2 inches. Set aside.

Cooking direction
Cooking time - approx 1 hours

1. Heat 1 tsp of cooking oil and 1 tsp of sesame oil in the claypot. Stir fry the lup cheong, salted mackerel and mushrooms till fragrant. Dish up.
2. Add another 1 tsp of cooking oil into the claypot. Once it heats up, add the finely chopped garlic and ginger. Stir fry till fragrant.
3. Add in the washed rice and the chicken stock. Bring it to a boil.
4. Cover it with the lid and let it cook for 20 minutes. Occasionally give it a stir.
At this time, when you open the lid, the rice smell so good and you may want to just stop there and eat it! No joke.
5. After the 20 minutes, add in the lup cheong, mushroom and salted mackerel into the rice. Give it a stir.
6. Top the marinated chicken on to the mixed rice. Cover the lid and let it cook over medium heat for 20 minutes.  *Remember not to add any of the marinate into this claypot.
7. While the claypot is doing it wonders, let's mix the ingredients in the sauce. Mix well.
8. Add in chye sim on top and cover the lid. Turn of the heat at this time. Wait for approximately 15 minutes and the chye sim will be cooked to perfection.
9. Add 3 tbsp of the sauce, mix the rice and do a taste test. If it is to your preference, scoop a bowl and enjoy!

Note:
i) For those who doesn't like lup cheong, just omit.
ii) Do not be alarm if you smell chao ta, because its claypot...the rice will burn. And this makes it more authentic, just like those selling at the hawker!
iii) I know I am using salted mackerel in oil instead of the traditional dried salted fish. I think I will incorporate the dried ones in my next cook. Fry the dried salted fish to its crispiness and mix it after the whole pot of rice is done. 

Wednesday 12 August 2015

Refreshing Capsicums & Black Fungus with Shrimps

It's been a while since I cooked and also post something on my blog.

While I was at the supermarket, I was thinking of cooking something new and I saw the "traffic lights" (red, yellow & green) capsicums/bell peppers.

I happily came home with the bell peppers, not knowing how best to cook them. Luckily for me, there was my precious black fungus. So I thought perhaps I can try using it. And being the usual lazy me, I added the prawns I bought earlier. This will reduce the hassle of perparing another dish. Hehe...


Ingredients 
3 halves of the traffic lights capsicums each
2 handfuls of dried black fungus
3 cloves of garlic, finely chopped
9 de shelled & deveined glass prawns
2 tbsp oyster sauce
A dash of hua tiao shaoxing wine
A dash of pepper
2 tsp cornflour with a tbsp water

Directions
1. Soak the black fungus in water for them to pump up and set aside.
2. De seed the bell peppers and silver them. Set aside.
3. Heat the wok with a tbsp oil, add in the garlic. 
4. Once the garlic is fragrant, add in the shrimps. Stir fry for a few seconds.
5. Add in the silvered capsicums and the pump up black fungus. Stir fry.
6. Add in the oyster sauce & hua tiao shaoxing and make sure that the sauce coats al the ingredients in the wok. Add a dash of pepper in. *I added half a bowl of water and close the lid for a few seconds.
7. When the prawns are almost done, add in the cornflour mixture to thicken the sauce.
8. Stir well and dish up. 


Thursday 9 July 2015

Red Bean Barley with lily bulbs

I was thinking of cooking curry and bought all the ingredients. But coming home to a husband who told me his tummy was unwell. I told myself it has to be the medication the doctor prescribe to him that is causing the discomfort. This cervical spondylosis is causing him so much numbness and pain. Now the stomach! 
To worsen matter, he isn't sleeping well at night. Not sure if this constitute to his weak stomach. 

So I decided to brew something nutritious and easy to eat. I came up with Red Bean + Barley + Lily Bulbs.
It is easy to prepare. All you need are
Ingredients


1 cup of red beans
1 cup of pearl barley
A handful of lily bulbs
Honey rock sugar to your liking
3/4 pot full of water

Note: you can adjust the amount of red beans and pearl barley to use. 

Direction
1. Rinse the red beans & barley separately. Pick those bad beans and barley out. Place them in a pot. 
2. Fill the pot with 3/4 full water. Brew the red beans and barley on medium heat. 
3. Rinse the lily bulbs and soak them in a bowl of water. Set aside.
4. Once the water is boiling, lower the heat and add in the rock honey sugar. *depends on your taste level for sweetness. Adjust accordingly.
Brew on low heat for half an hour.
5. Discard the bowl of water and add in the lily bulbs. Continue to let the soup brew till your liking. 
*If u like the beans to be mushy, brew it for an hour. 

Here you have it, a bowl of sweet nutritious soup that my husband eats for his lunch and tea break yesterday. It can fill the stomach and warms it. Give it a try the next time you are feeling under the weather.

Saturday 23 May 2015

Savoury Prawns in Chili & Ketchup sauce

My family loves seafood and one of the most common shellfish is prawn. Thus I have been trying various way to cook shrimps or prawns. I have cooked this recipe for my husband and he kinda likes it because of the sauce. Well my husband is the only person who doesn't fancy seafood. Maybe it's because of his cholesterol. Ah who cares. My parents and my brothers love seafood. So it can be quite a challenge to prepare different method of the same ingredient. Of course there are hits and there are misses. This one is a hit. Serve it hot with a bowl of steamed rice. Heavenly!!!

My recipe is based on my agar-ration (estimation).


Ingredients 

600g of glass prawns 
4 to 5 cloves of garlic, finely chopped
3 tbsp of tomato ketchup (Hunts brand)
3 tbsp of garlic chili sauce (Sinsin brand)
*1 tsp of lychee chili sauce (a new twist)
A handful of cherry tomatoes
2 eggs
Coriander, for garnish (which I don't have on hand today)

Method

1. De-shell and de-vein the prawns. Wash and set them aside.
2. Wash the cherry tomatoes & quarter them. Set aside.
3. In a pan, heat up the oil and stir fry the chopped garlic.
4. Add in the prawns and toss them for two minutes (depends on the size of the prawns).
5. Toss in the cherry tomatoes and stir.
6. Add in the sauces and mix the prawns well in the sauce.
7. Beat 2 eggs and pour them over the prawns. Do not stir*. Once the sauce is bubbling, turn off the heat and cover the pan with its lid.
8. Once the eggs have solidify, dish it up and serve it hot. 
9. Garnish it with coriander.

*I learnt it the hard way. I have stirred and the eggs disappeared into the sauce. So if you want those eggs lingering around, DO NOT stir. 

Friday 8 May 2015

绿豆汤 Green Bean/Mung Bean Dessert

Just a little background, my parents-in-law are both Baba-Nyonya. My mom-in-law's style of cooking is very different. Something one cannot find in Singapore. Both my in laws are from Terengganu. Hence I believe her method of cooking Peranakan cuisine has incorporated some of flavours of Terengganu.

I am still trying to find time to learn to cook most of her dishes. Perhaps one day. Perhaps one day.


But there is one which is simple and easy to prepare. Green bean or Mung bean - well this can be easily found anywhere in Singapore and to many, it is very easy to cook. Is it really that easy?


But it is the way to cook it. And for me, I adopted my mom-in-law's way of cooking and introduced a little of my own. A slight difference does make a huge difference in taste.


A dessert that my family loves

Ingredients

1 cup of mung beans
1/2 cup of sago
270ml coconut milk (I use one can of Ayam brand Premium Coconut Milk)
5 cups of water
Honey rock sugar, to taste
Gula Melaka, to taste (I use those bought from Terengganu)
3 to 5 pieces of pandan leaves, tie them into a knot

Directions

1. Rinse the mung beans and pick out the bad beans.

2. Drain all water. Stir fry the mung beans in a pot till you can smell the fragrant of the mung beans and when the beans turns a little brown.

See how green the mung beans are
After frying for a while..it turns a little brown

3. Add in the water and the pandan leaves to the pot and bring it to a boil. 

Add in the pandan leave & water

4. Lower heat and allow it to simmer. Remove the pandan leaves.

While waiting for the mung beans to soften, time to cook the sago. You can always cook the sago before cooking the mung beans or cook them both at the same time. Recipe for cooking sago pearls.


5. Now back at the mung bean that is simmering. Once the mung bean has "broken", add in the coconut milk and honey rock sugar, to taste. Stir well.


6. Allow it cook for a few minutes till the honey rock sugar melts totally. Add the piece of gula melaka to the pot. Stir till it melts.

I use gula melaka from Terengganu

7. Add more honey rock sugar or gula melaka, to taste.


Here you have it. Give it a try at home. You will love this mung bean dessert.


Voila...rich in coconut but it doesn't overpower the taste of mung beans.

Art of cooking sago


I used to be very lazy. Just dump all the sago into whichever dessert I'm cooking. The dessert always turns out to be starchy...very starchy. So I decided to cook the sago separately.

See how translucent and pretty these little pearls are...it's worth the trouble to prepare them separately.


Ingredients

1/2 cup of sago
A small pot of water

Direction

1. Bring a small pot of water to a boil. Add in the sago.
2. Under low heat and cook the sago for 10 to 15 minutes.
3. Stir occasionally to avoid it sticking to the bottom or sides of the pot. Turn of the heat and cover the pot with a lid. Allow it to sit for another 10 to 15 minutes.
4. After 10 to 15 minutes, the sago will be translucent but with the starchy residue.
5. Use a soup ladle, take one scoop and place it in a sieve.
6. Under running water, stir the sago with a soup spoon. Turn off the running tap and stir the sago in the sieve till most of the water drains.


7. Transfer the sago to a clean and empty bowl. Repeat this step for the rest of the sago. Set aside. You will find the sago are cooked and translucent.

Monday 13 April 2015

Old Cucumber Soup 老黄瓜汤

The weather in Singapore is so crazily hot and I guess to brew a pot of soup to cool the body heat. 

It's a brownish colour wrinkled cucumber. It is known to help regulate the inner body temperature. And some believe it has anti-aging agent! 

So let's brew Old Cucumber Soup 老黄瓜汤. 

Note: Most people add dried cuttlefish or dried oyster to sweeten the soup but I didn't add them mainly because I was unable to get it. So I increase the amount of pork bones, dried scallops and hours of simmer, the soup is still very flavourful.
For those who likes some vegetables, you may add in chopped carrots or sweet corns.


Serves 4
Cook time at least 2 hours
Ingredients
- 1 old cucumber
- 2 litre of water
- 8 red dates
- 10 conpoy/dried scallops
- 500g pork soft bones
- 3 skinless chicken thighs
- salt to taste

Directions 
- Scrub the skin of the old cucumber clean and cut it in half. Use a spoon to scoop out the seeds and wash it clean. Cut it into wedges.
- In a small pot, parboil them. Rinse and set aside. 
- Remove the skin and excess fats of the chicken thighs. Rinse and set aside.
- Place the old cucumber wedges, red dates, conpoy, blanched pork soft bones in a 2 litre pot of water. 
- Bring it to a boil, lower the heat and add in the skinless chicken thighs. 
- Simmer the soup over low heat for 2 hours.
- Season it with salt to taste, if necessary.
- Serve hot.

Monday 6 April 2015

Improvised Oven Roast Crispy Chicken

I have been wanting to make my very own crispy on the outside, succulent in the inside chicken. And I think I have created one just the way I want it!

When I first serve the dish to my hubby (Mr W), he turned and looked at me, asked, "What did you use to season? It tastes good." Aww...the green light that I needed. 

It's easy to make this crispy chicken thighs. 

Ingredients 
8 pieces of chicken thighs skin on
Kosher salt
Olive oil

Spices
Ground black pepper
Garlic powder 
Cayenne pepper
Cinnamon powder

Direction
1. Wash the chicken and trim away excess fats.
2. Pat dry the chicken pieces. Sprinkle and run the kosher salt and black pepper on all sides of the chicken. Let it sit at room temperature for 15 minutes to take the chill off.
3. In a small bowl, mix all the spices. Set aside.
4. After 15 minutes, pat dry the chicken again. Sprinkle and pat the mixed spices on both sides of the chicken. 
5. Preheat the oven to 205°C. Drizzle olive oil on the baking pan. Arrange the chicken pieces skin side up. Remember not to crowd the pan, allow room between the chicken pieces.
6. Bake in the oven for 25 to 30 minutes at 205°c. This will brown the chicken. Then lower the heat to 170°c and bake for an additional 10 to 15 minutes until the juices run clear.
7. Remove from the oven and transfer the chicken pieces to a serving dish. Use an aluminium foil to tent the chicken and let it rest for 5 to 10 minutes before serving.

Note:

i) For those using a whole chicken, arrange the largest pieces (usually the breast) of the chicken at the centre of the pan.
ii) For those who has no intention of eating the chicken skin, leave the skin on for baking. This will help to keep the chicken pieces from drying out while they bake.

Give it a try! It's the simplest recipe so far for chicken. :) But be warned, the oven tends to get pretty oily afterwards.